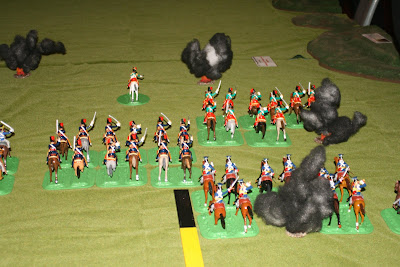
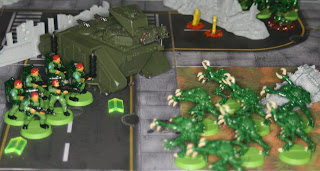
The final attack was a close run thing. Hordes of genestealers, hormagaunts, termagants and warriors driven by the floating brains of two zoanthropes emerged from the venomthrope’s vapour cloud and threw themselves at the imperial defences. Yet, the Imperial firepower prevailed. The disciplined Vostroyan troops held their ground and poured continuous lasgun fire onto the charging aliens. The small squad of Death Watch Marines added the explosive rounds of their boltguns and heavy bolters, shredding the screaming Tyranid warriors as they charged. Not a single alien breached the walls of the hastily constructed fort.
As the smoke cleared, the last of the Tyranids were observed slinking back behind the hills and woods surrounding the fort. Beneath the walls dozens of chitinous shells lay lifeless, oozing ichor and acidic blood. The men of the Vostroyan 902nd took a breath and thanked the Emperor for their delivery. Although many of them suffered minor wounds, only three men lay dead. Major Volkhov called for reports and the sergeants began to redistribute ammunition and commence weapon checks.
Inquisitor Izenfard surveyed the situation. It seemed too easy. Certainly the presence of his small retinue and the Death Watch had added welcome additional firepower, but the Aliens seemed less determined than he would have expected.
His mission had, however, been a partial success. He was certain that he had spotted the Broodlord and a small coven of cloaked cultists watching proceedings from the protection of a nearby hill. Now he knew for certain that the planet had been infected by a genestealer cult. He must make a report and take steps to purge this disease.
The men moved about the fort, slowly collecting ammunition, repairing the sandbagged walls and congratulating one another. The wounded were tended and the bodies were carried to the rear for evac.
Similar scenes were occurring all over the planet. Small groups of Imperial Guard, Planetary Militia and various other armed groups occupying isolated defensive positions had held back swarms of aliens. It was an herculean effort and many felt they had saved the planet.
Humans will never grasp the subtlety of the hive mind.
As the Vostroyans began to distribute food packs and clean their weapons, the lookouts shouted “they’re back”.
From all sides, large, lumbering gun beasts crested the hills and pointed their symbiotic weapons at the emplacements. The alien plan had worked. The humans were now concentrated in small pockets that could be surrounded and picked off at will by the living ‘tanks’ of the aliens. Men rushed for cover and the heavy weapons were cleared for action.
At some undetectable signal, the aliens opened fire. Jets of acidic liquid, explosive spores and various living projectiles were hurled towards the men now huddled behind barricades. Stage two had begun.
Sunday, June 6, 2010
Thursday, May 27, 2010
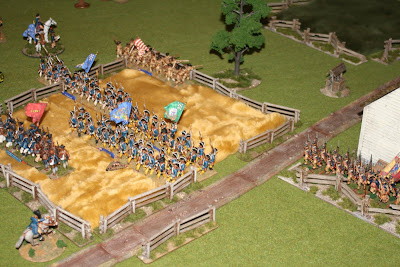
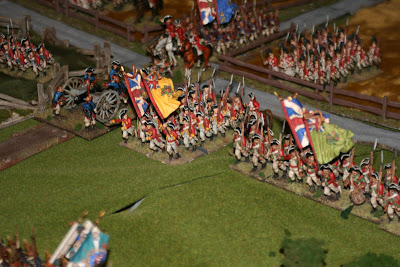
Little Wars Melbourne
Little Wars was held in Melbourne last weekend (23rd May). From what I saw, a great day was had by all.
Thanks to the organisers, the groups who put on demo and participation games and the suppliers who supported the show.


Thanks to the organisers, the groups who put on demo and participation games and the suppliers who supported the show.


Monday, April 19, 2010
The Tyranid Forces
The Tyranid forces for the previous battle report were:
2 broods of 8 gaunts with fleshborers. Quality green (d6), LD 1, Mob 6, arm d4, FP 1, I d8, Attack 1, damage d6. Move through cover.
2 broods of 8 gaunts with devourers. Quality green (d6), LD 1, Mob 6, arm d4, FP 3, I d6, Attack 1, damage d6. Move through cover.
2 broods of 8 hormagaunts. Quality green (d6), LD 1, Mob 8, arm d4, FP 0, I 0, Attack 3, damage d6. Move through cover, fleet, bounding leap.
1 brood of 8 genestealers. Quality green (d6), LD 1, Mob 8, arm d8, FP 0, I 0, Attack 2, damage d8. Move through cover, fleet, rending.
4 mine nodules
All Tyranids (except genestealers) are subject to the hive mind and instinctive behaviour. This means that when they are activated, they will either ‘lurk’ or ‘feed’. A unit that is lurking may only move toward an enemy unit if it is moving towards cover. They will not close assault an enemy. A unit that is feeding will always move towards the nearest enemy and will close assault if possible. Only the intervention of the hive mind can alter this behaviour. Synapse creatures, that have a close link with the hive mind, can attempt a communications test to activate other broods in the same way that human leaders can activate subordinate units. When activated in this way, the brood will obey the hive mind unquestioningly. Tyranids always have a high motivation.
Genestealers activate and move according to the normal rules and have their own confidence. They are designed to be killers in close combat. As a result, whenever they are involved in close combat, they use a quality die of d10 instead of their normal d6. This applies when they are testing confidence to assault, testing at the end of a combat round and when they are rolling for attack and defence in close combat (see house rules).
Move through cover: Treat all terrain as one class better than it is. For example rough terrain is treated as clear.
Fleet: Add 2” to movement.
Bounding leap: Ignore movement cost to cross obstacles/ climb buildings.
Rending: Opponents receives negative one die shift to armour type.
Spore Mines: Move 1d6” towards nearest enemy. If within 3” they explode with a 3” burst. Impact d8. Each turn, every active nodule produces a new spore mine.
Robbo's Roughnecks
This is a description of the IG force used in the previous battle report.
All forces began the game 'confident'.
Platoon HQ: Lt Robinson,3 guardsmen. Quality regular, LD 2.
Squad 1: Sgt Bogart + 9 men. Quality regular, LD 2. 9 Laser rifles, 1 plasma rifle.
Squad 2: Sgt Cagney. As above.
Squad 3: Sgt Flynn. As above.
Squad 4: Sgt Wayne. As above.
Assault Squad: Sgt Wayne + 5 men. Quality veteran, LD 2. 5 heavy laser rifles and 1 plasma gun.
2x Fire Support Vehicles: Cpl Clarke and Gable. Quality regular, LD 2. Twin heavy bolters. Tracked (d12 movement).
All guardsmen have partial light armour (d6) and the storm troopers have light armour (d8). The FSV are armour class 1.
Laser rifles: FP 1, I d6
Plasma gun: FP d6, I d10
Heavy laser rifle: FP 2, I d6
Twin hvy bolter: FP 3d10, I d8.
Rapid fire: Laser rifles, heavy laser rifles and plasma guns can fire in sustained mode. If the squad spends 2 actions firing instead of 1, shift the FP die up by one. Eg, a squad of 9 riflemen and 1 plasma gunner would normally have FP (9x1) d10 + d6, but if they choose to rapid fire (use both actions to shoot) they fire at FP d12 + d8. They still only fire once per activation.
Frag Grenades: All guardsmen have frag grenades that can be used to destroy mine nodules and the hive node. They require 1 action to place and have an impact of d6.
Krak grenades: The stormtroopers have krak grenades that can be used to destroy mine nodules and the hive node. They require 1 action to place and have an impact of d12.
Sunday, April 18, 2010
Stargrunt 40K
Background
Why attempt to convert 40K to stargrunt?
I like the look and style of the 40K figures and have collected quite a few over the years, but I don’t find the rules very satisfying. Whereas, I like the use of suppressive fire and the command and control rules of SG. The 40K universe also provides a variety of alien forces to add interest to games and most potential opponents are familiar with this background.
I think it is important to try to carry over some of the flavour of the 40K troops and weaponry into the game rather than just renaming some of the Stargrunt weapons to match the 40K names. Additionally, if I am to convince any 40K players to play my games, they need to have some sense of how troops and equipment will operate, at least on a relative scale. Thus, the performance of equipment and troops needs to be broadly similar and some of the 40K special rules need to be replicated.
The basic rules, although appearing completely different, are in fact quite similar. Both use squads as the basic manoeuvre element and are aimed at platoon to reinforced company sized forces. Units move, shoot and engage in close combat, where the effectiveness of weaponry depends on the skill of the user, the lethality of the specific weapon and the armour or defensive qualities of the target, with just a little luck thrown in.
The greatest difference is in the role of leaders. In 40K, leaders tend to be the best equipped and most effective combat troops. In Stargrunt, leaders concentrate on commanding their forces and are penalised if they engage in combat: especially if they loose! One way around this is to treat 40K leaders, not as part of the chain of command, but as heroes or special characters and leave the commanding to less well endowed professionals. Alternatively, the heroic style of leadership found in 40K will continue to work in Stargrunt, but the command benefits will be reduced.
40K Edition
These rules are based on the 2008 edition of Warhammer 40K.
Rule Amendments
All of my normal house rules apply to this set of rules.
Psykers
Psychic powers are an important part of the 40K universe. There effects are fairly easy to replicate as most are essentially another type of weapon. To use a psychic power, the psyker must first pass a reaction test.
Troop Types
Stargrunt categorises troops into green, regular and veteran. There are also the special categories of militia and elite that can be used for special cases. Troops are also given a leadership rating between one and three with one being the best. These categories determine how well the troops shoot, engage in melee and deal with morale issues.
40K uses three different attributes to determine these abilities. BS (ballistic skill) is used to rate the ability to use projectile weapons. WS (weapon skill) is used to rate the close combat abilities of the troops. LD (leadership) is used for morale tests. Some sort of averaging system is needed to convert statistics from one system to the other.
The main human forces in 40K are: guard conscripts, guards, veterans and space marines. Ideally, I want space marines to be considered the elite forces of the imperium and guardsmen should equate to the standard SG human. Adding WS and BS for these troop types gives the following: conscripts 4, guards 6, veterans 7 and marines 8. Thus we can establish the following conversion rule.
A sum of 4 or less equals militia. A sum of 5 equals green, 6 equals regular, 7 equals veteran and 8 or more equals elite.
For troops with a particularly low leadership or some other special cases, this may be adjusted accordingly.
40K LD is usually between 5 and 10. The Guardsmen are rated as 7 and the Marines as 8. If we again take this as the average human, we assign these values to a Stargrunt leadership of 2. By extension, a 40K LD of 9 or 10 gives a Stargrunt leadership of 1 and a LD of 5 or 6 results in a leadership of 3. Anything that falls outside this range, can be dealt with using special rules.
These classifications, only refer to the average example of the specified troops. Troop quality, or leadership may vary according to the scenario or whatever force composition rules you would choose to use. Some suggested random values are included in the table.
Personal Armour
40K defines armour by its "armour save" value. Stargrunt has 5 types of personal armour, each of which is associated with a dice type: Basic Battle Dress (D4), Partial Light Armour (D6), Full Light Armour (D8), Light Power Armour (D10) and Heavy Power Armour (D12). This provides a simple one to one correlation between armour save and armour type.
This scheme maps simply to the 40K scheme of armour saves. A save of none of 6+ equates to an SG armour type of d4. A save of 5+ is armour d6 etc.
Optionally, particularly tough troops (usually alien) might also gain a benefit to armour. The average toughness for humans is 3 for Imperial Guard or 4 for Space Marines. This is therefore the mean that is represented by the normal Stargrunt armour. If a creature has a toughness greater than 4, then shift up their armour dice. If the toughness is less than 3, for a particularly weak creature, then shift it down.
Weapon Systems
Weapons in stargrunt fall into four basic categories:
Close combat weapons are those dedicated to close combat such as bayonets and swords. This also includes the specific 40K weapons such as lightning claws and power swords, as well as claws and teeth.
The standard Stargrunt rules have been modified to provide greater variety in close combat weapon performance. See new rules in an earlier post.
Many 40K close combat weapons have special characteristics. In general, to convert these to stargrunt, use the following guidelines. Weapons that confer an extra attack have a high attack value. Weapons that ignore armour have a high damage value.
Typically, troops with no close combat weaponry have a melee value of 0.5. A single close combat weapon provides a melee value of 1.0, while 2 close combat weapons have a value of 2. This can be further modified if the troops would normally have additional attacks or are particularly skilled in close combat. The damage value for weapons is based on the strength of the user.
The weapon’s impact is based on its user’s STR. STR 2-3 becomes 1D6 impact, STR 4-5 becomes 1D8 impact.
Small arms are the personal weapons carried by the majority of infantrymen, generally rifle-type arms but also including pistols, submachine-gun types and similar.
The Range characteristic is used to determine the weapon’s firepower. Each 12" increment in the weapon’s range equals 1 firepower point. So, a range of 12" is firepower 1, a range of 24" is firepower 2 etc. Weapons with a rate of fire of 2 or more get an extra firepower point.
The weapon’s impact is based on its STR. STR 2-3 becomes 1D6 impact, STR 4-5 becomes 1D8 impact.
Weapons with a limited range may be limited to close range (a single range band).
Infantry support weapons are things like squad automatic weapons, man-portable plasma guns, small portable missile or rocket launchers and so on- anything that may be carried and fired by a single trooper.
The Range characteristic is used to determine the weapon’s firepower. Each 12" increment in the weapon’s range equals 1 dice shift. So, a range of 12" is firepower 1D4, a range of 24" is firepower 1D6 etc. Weapons with a ROF of 2 or more gain a +1 dice shift.
The weapon’s impact is based on its STR. STR 2-3 becomes 1D6 impact, STR 4-5 becomes 1D8 impact, STR 6-7 becomes 1D10, STR 8-9 becomes 1D12. This impact value is used for dispersed infantry (including PA equipped troops). The impact against armoured targets is shifted up or down depending on the AP value of the weapon. A 5 or 6 means shift down one die and a 1 or 2 means shift up one die.
Some weapons have a blast effect. For these weapons, the FP die is shifted up by one for a blast weapon, or two for a large blast. Usually, the damage die is shifted down to compensate.
Some vehicles mount support weapons. These weapons use their normal firepower dice not the fire control of the vehicle and use the quality of the troops to determine the range bands for the weapon just as infantry support weapons.
Heavy weapons covers any weapon that is large enough to require mounting on a vehicle, or on a tripod, wheeled, hover or grav-mount. Heavy weapons range in size from medium/ heavy crew served machineguns right up to the heaviest tank gun.
Those on ground mounts are generally crewed by 2 persons and take one action to set up and one to take down. Both crewmen are required to move the weapon and are encumbered (d4 movement) when doing so. A single trooper in power armour is able to carry and use some heavy weapons, in which case they do not need to be setup or taken down. Light PA troops are encumbered but heavy PA troops are not.
SG replaces firepower with a fire control dice. However, the nature of many heavy weapons in 40K is better represented by retaining a firepower value.
For most weapons, the impact value is calculated in the same way as for support weapons: ie it is based on the STR of the weapon. This is the impact value used against all target types.
Most heavy weapons of class 2 and above only get a D6 impact versus Infantry because they are basically dedicated anti-armour weapons.
Range for heavy weapons is not really an issue in stargrunt. However, the weapon class represents the maximum range multiplier that can be used due to target size. Eg. a class 2 weapon has a 12" range band versus class 1 targets and a 2x12" range band against class 2 targets and above.
Firing a heavy weapon requires one action and may not be combined with fire from other weapons. Vehicles with multiple crews have additional rules.
Special weapons are any weapons that have special rules. They may be support weapons or heavy weapons.
For example, twin linked weapons usually get a +1 FP die shift to reflect higher rate of fire.
Vehicles
Many vehicles have multiple crews. When a vehicle is activated, it is essentially the commander who is activated. He may initiate 2 actions as for a normal squad. Thus, a vehicle may move twice, move once and shoot one weapon etc. However, if the vehicle has a dedicated driver, an additional move action (up to a max of 2) may be taken. Each weapon that has a dedicated gunner may also take one fire action (though each weapon may only fire once per activation). Thus, a vehicle may move twice and fire any/ all weapons (if they have dedicated gunners).
Crew can bail out of a vehicle.
Armour values
Vehicle armour in 40K seems to vary between 10 and 14 while Stargrunt uses classes 1-5. To convert from 40K, 10-11 equals armour class 1, 12-13 equals 2, 14-15 equals 3. Higher armour classes are reserved for larger vehicles, bunkers etc.
Mechs
Some vehicles are a type of mech. These include the Space Marine dreadnought, large Tyranids and some of the Tau battle suits. They have some characteristics like vehicles and some like power armoured troops. In general, they are treated as vehicles and given a size and armour value. However, they can engage in close combat and follow all of the rules for that.
Tuesday, March 23, 2010
Battle Commentary
I received an email pointing out that the narrative format made it hard to see a difference between a SGII game and 40K. I guess, in a way, that is a compliment, and it isn't directly my aim to compare the two systems. I simply prefer SGII as a game, but confess to liking both the miniatures and background of 40K.
However, I thought I would just include a small commentary that might give a feel to how SGII works for those who are not familiar with it. My notes for the game do not generally include the actual dice rolls and scores etc, but there is enough information to reconstruct roughly what happened.
Firstly, just a quick summary of the game differences.
SGII uses alternate squad activation rather than the IGOUGO sequence of 40K. When activated, a unit can perform 2 actions: move, shoot etc. The major restriction is that no weapon may be fired more than once in a given activation. There is no inherent reason one is better than the other and both can certainly provide an interesting narrative. Particularly if you assume that in reality, many things that appear to happen sequentially due to game mechanics actually happen simultaneously.
To play the game solo, I use a chit pull method. In a cup, there is one red chit for each human unit and one for each alien unit including one representing all of the spore mines. When a chit is drawn, I activate a unit from the appropriate side. In this scenario, the aliens received one new unit at the end of each turn, so one extra chit was placed in the cup at the same time.
Thus, early on in the game, there were more human units that aliens, but as the game progressed the numbers balanced out. Similarly, when one unit was removed, or two units merged (as the two gaunts with devourers did late in the game) the number of chits is adjusted accordingly.
The other mechanic that needs mentioning is the opposed die roll. Various capabilities, such as troop quality, weapon firepower or armour class, are rated with a particular die type (d4, d6, d8, d10 and d12). Results are determined by rolling one or more of these dice against a target value set by rolling another die. For example, to convert a ‘hit’ to a ‘kill’ the target rolls a die matching its armour class and the firer rolls a die matching the weapon impact value.
I will begin the commentary at game turn 9, as this is where the crucial action is set up. The diagram below is an attempt to recreate the initial positions.

The tyranid forces are:
1 genstealers
2 termagants with fleshborers
3 termagants with devourers
4 hormagaunts
5 termagants with fleshborers
The two ‘S’ symbols mark approximately where the remaining spore mine nodules were and the ‘H’ marks where the hive node is.
Turn 9.
Cagney shoots at the genestealers scoring 2 hits, but no kills – ie suppression. Scott advanced towards the fleshborers in the archive and shoots with no effect. Flynn also advances and shoots with no effect. The fleshborers return fire against Scott with no effect. Fleshborers in the chapel shoot at Wayne with no effect. The devourers, who had two suppression markers, recover one suppression, but fail the other. Wayne shoots at some nearby spore mines and destroys them. The hormagaunts remove their suppression and advance towards the CP. Gable shoots at the devourers suppressing them again. The genestealers also remove their suppression and advance behind the hormagaunts. The HQ activates and runs away, also ordering Cagney to make a run for it, which they do and both exit the western side of their ruined building.
Comments
The apparent ineffectiveness of the shooting results from two factors. Both lasguns and fleshborers are some of the poorest weapons. The have quite low firepower values and quite low impact values. Most of the terrain is at least ‘cluttered’ and provides an added difficulty to the ‘to hit’ rolls representing obscuration and the buildings also provide a hard cover bonus to armour die rolls.
Shooting works using the opposed die roll method. First a range die is determined based, surprisingly, on the range between target and firer. In the case of the guard firing, the range increment is 8 inches, equel to their quality die type. So at 0-8 inches, the range die would be a d4, at 9-16 inches a d6 etc. If the target is behind some sort of concealment, the die is shifted up by one type. In this example, the range was probably just over 8 inches and the termagants were in a building, so the range die was a d8. The firer then determines their firepower. This is either the sum of the small arms firepower for the sqadd and/ or any support weapons. In the case of Scott's guard squad, there was 6 riflemen, each with a firepower of 1, and a plasma gunner. So the total firepower was 6x1 = 1xd6 plus a d6 for the plasma gun. To this, they add their quality die of a d8. So, I put 2x red d6, 1x red d8 and 1x green d8 in a cup and roll the dice. The red dice have to beat the single green die to have an effect. If one die beats the green one, the target is suppressed, if more than one, then you calculate hits and compare weapon impact vs target armour to calculate kills.
At the end of the turn, the platoon HQ was able to re-activate Cagney’s squad and have them run away from the genestealers. This is one of the features of the rules that I really like. Commanders command. They can spend one action to attempt to communicate with a subordinate unit and have it (re)activate. Because they have two actions, a platoon command can attempt to activate two subordinate squads. This is one of the main ways to differentiate forces – command density or span of command.
In this scenario, the Tyranids had no commanders, and so could not benefit from these extra activations. This will be described in more detail when I post the rules for the Tyranids.
Turn 10.
Gable fired at the hormagaunts shielding the genestealers with no effect (ie rolled tragically low). Wayne also fires on the hormagaunts and kills 1. Cagney uses 2 actions to keep running and makes it to the scriptorium. The genestealers charge Wayne (as he is now the closest enemy squad). In response, Wayne opts to voluntarily fail his reaction test meaning that his squad drops a confidence level (from confident to steady) and withdraws behind Gable. This also means he sacrifices the option to stand and shoot at the genestealers as they charge. Luckily for him, the genestealers roll quite low on the movement dice and do not make contact, leaving them in the open and surrounded by IG weapons. the fleshborers shoot at Scott and suppress his squad. The hormagaunts remove their suppression, but remain in location. The HQ attempts to activate Wayne’s squad again and has them shoot at the genestealers. It also tries to reactivate Gable, but fails the comms roll. Wayne scores 3 kills (the first against the genestealers) and they pass their reaction test.
Arguably, here, they might have preferred to fail and withdraw behind cover. Unlike the reaction to charging, the rules do not permit voluntary failure from shooting, but this ought to be considered.
Scott recovers from his suppression and continues shooting. The devourers recover one suppression marker again, but still have one. And Flynn continues to advance and shoot.
Comments
I fully expected the genestealers to reach the stormtroopers and wipe them out and it seemed, given the positions at the time, the most likely thing for them to do. in fact, at the beginning of the turn, I was concerned because there were three guard units well within range of the genestealers and it didn’t look likely they would all get away.
I did not note the exact distances etc, but the genestealers roll 2d8x2 for movement, giving them the potential to cover 32 inches. The storm troopers could not have been 20 inches away even after they withdrew a bit. This would have a significant effect on the battle as only the storm troopers were equipped with the melta-bombs necessary to destroy the hive node. Krak grenades have a small chance of succeeding.
As it was, the combination of firepower and a bit of luck saved the guard.
Turn 11.
Gable shoots at the genestealers and kills 4. They continue to stand/ threaten, but have 2 suppression markers in total. The hormagaunts charge the HQ, but don’t quite make the distance. Wayne shoots at the genestealers and kills the last ones. Cagney shoots at the hormagaunts, killing 1. The HQ orders Cagney to keep shooting and they take a shot themselves with no effect. Cagney’s fire kills another hormagaunt. Scott and Flynn and the fleshborers continue suppressing one another.
Comments
At this point, the genestealers are dead and the remaining 4 broods of gaunts are at less than half strength. The hormagaunts are in the open and will probably be shot to pieces before they can recover from their suppression and charge again. The other broods will stay hidden amongst the protection of the ruins but are too ineffective to stop the guardsmen from mopping them up.
Overall, I was pretty happy with how both armies played. The guards mostly stuck with the plan of using their firepower to suppress the tyranids and stop them getting close. The genestealers using the hormagaunts as a shield seemed likely and almost worked twice.
The dice seemed to work evenly against both sides. Early on, Scott’s squad kept rolling very low for movement and hence took far to long to get to the second mine nodule and when they finally did, they took three goes to destroy it, losing 2 or 3 guys in the process. (Sgt Scott was subsequently shot for incompetence) The spore mines themselves were not all that effective, apart from the lucky one that damaged Clarke’s Razorback leaving him at the mercy of the nearby hormagaunts. Their main job was just to slow down the guards and give them something else to worry about occasionally.
So, stay tuned for the actual rules.
Stargrunt Battle Report
Despite the best efforts of the Imperial Fleet, system defence ships and even merchant vessels, a few hive ships made it within striking range of the planets of the Anglia system. Thousands of mycetic spores rained down onto the planets. Local defence forces were quickly mobilised to try to clear the infestation before it could take hold.
This is one such battle.
“Right lads, gather ‘round. You have all seen the meteors. They are alien spores. The army is being dispersed to find them and destroy them. A meteor has been reported down in Aquila Square and we have been ordered into the city to clear it.” A murmur ran through the assembled platoon as the soldiers alternately expressed concern and bravado.
“Here is the plan” Lieutenant Robinson continued. “We will approach from the south in a rough line clearing the buildings as we go. The impact has damaged most of the buildings, so be careful.”
“Clarke and Gable, you will form our main fire line. The FSVs will advance north on either side of the square providing fire support. Bogart, your squad will be on the far right and you will clear the Shrine on the east of the square. Flynn, your squad will clear the Scriptorium on the west of the square. Scott, you will be the far left and clear along West St and then the Archive building to the north. Cagney, you will hang back in the centre as a reserve. And Wayne, you and your storm troopers will be the assault team. Once we find the hive, you will take it out.”
“Questions? Ok, mount up, speed is critical.”
1
Bogart and his men crept carefully through the Shrine, picking their way over the rubble. Unseen by Bogart’s men, a brood of termagants, that had emerged from the hive, scuttled into the ruined chapel directly north of the Shrine. Luckily, Corporal Gable, in his Razorback, detected the movement and turned his turret mounted twin heavy-bolters on the aliens, downing one of them. Corporal Clarke, in his Razorback, began picking off spore mines floating across the square.
On the other side of the Scriptorium, Sergeant Scott fired at a floating spore mine, causing it to explode. He then ordered his men to edge forward along the western wall of the Scriptorium. At the same time, Flynn and his squad climbed into the ruined Scriptorium and began picking through the rubble as another brood of termagants slithered out of the hive.
2
LT Robinson grabbed the vox and encouraged his men to push forward as rapidly as possible. Upon reaching the northern end of the Shrine, Bogart’s squad took up firing positions and destroyed yet another floating mine. On the other flank, Scott’s team ran toward the nearby spore mine nodule and dropped some krak grenades into its mouth destroying it with a satisfying bang. Flynn and his men clambered over the rubble to try and keep in line with Scott.
The second brood of termagants rushed towards the Archive building north of the square, while the first brood fired their fleshborers at Bogart’s men, killing one. Clarke responded with his heavy bolters and downed another two of the aliens, and Gable added his suppressive firepower. Meanwhile, Cagney fired at another pair of spore mines drifting across the square. Yet more termagants flowed out of the hive like ants.
3
Bogart’s men fired on and detonated another spore mine that emerged from a nodule in front of them, and Scott did the same, however, it did not explode. Flynn saw the mine and ordered his men to shoot at it too before it reached Scott’s squad. Cagney continued his long range fire at any spore mines that drifted into the open space of the square.
Gable engaged the termagants that were making for the Archive, catching them as they reached the protection of the collapsed walls. One of them didn’t make it. Lieutenant Robinson shouted into the vox for Flynn and Scott to get a move on before the critters could get established in the Archive. But they were still being held up by a couple of spore mines floating in the air between them and their objective. Both teams did, however, now occupy the northern wall of the Scriptorium and could at least bring fire to bear on the Archive.
Assessing that the hive node must be behind the Chapel, where both broods of termagants had come from, Wayne took the opportunity to advance up behind Gable’s Razorback, hoping for a chance to dash froward with his melta-bombs.
Clarke edged his FSV up to the corner off the Shrine and fired at a spore mine drifting towards Bogart. But the third brood of gaunts, armed with devourers, took the opportunity to rush towards a pile of rubble linking the Chapel to the Archive. The gaunts now formed a continuous line protecting their hive and a fourth brood, hormagaunts this time, scuttled out of the hive looking for something to attack.
4
The platoon seemed to be in a good position. Both large buildings had been cleared and the probable location of the hive had been identified. However, the gaunts had dug in amongst the rubble and would prove difficult to eradicate.
Gable turned his heavy bolters on the gaunts directly in front of him in the rubble. The explosive shells halted their advance and tore two of the bugs to pieces. The termagants in the chapel fired on Bogart’s men keeping them busy, but Clarke returned fire with his heavy bolters and swatted yet another bug. This didn’t stop the hormagaunts from rushing over the rear walls of the chapel ready to spring forward and carve up any humans they found with their scything talons.
Meanwhile, on the other flank, Flynn continued to shoot at the spore mines that kept emerging from the earth in front of them. Scott’s team also fired on the spore mines and, having cleared the area, advanced on the nodule. Cagney kept the square clear of mines by continuous fire and it seemed as if every one was firing in all directions.
But, still unobserved, another brood of hormagaunts, erupted from the hive, hungry and angry.
5
Gable kept up his fire on the gaunts at virtually point blank range and another two bugs were left nothing but pools of ooze amongst the rubble. Wayne joined in, firing on the chapel. Flynn took out yet another spore mine and Scott rushed to reach the now unguarded nodule.
The second hormagaunt brood rushed around the chapel, on the eastern side, heading straight for Bogart’s squad in the Shrine. The spore mines continued to drift around the battlefield, and, just as one of Scott’s troopers reached the nodule with a grenade in hand, one emerged and detonated right in his face. The two gaunt broods with fleshborers returned ineffective fire, and the devourer armed brood fired at Gable. The volume of fire from the devourers temporarily knocked out the FSV’s sensors.
The hormagaunts in the chapel then leapt the walls and charged directly for Bogart and his men. Luckily, they saw it in time and scrambled backwards away from the wall just in time at the gaunts stabbed at every gap with their long talons. Falling on their backs and kicking as fast as they could to escape, Bogart’s men fired almost blindly at the gaunts as they attempted to climb through the walls, and, unknowingly, managed to kill one of them.
Cagney maintained his clear-by-fire across the square, and Clarke, having missed the chance to shoot at the first group of hormagaunts, turned his guns on the brood east of the chapel and killed two of them. Lieutenant Robinson tried to encourage Bogart and Scott to keep pressing forward, but Bogart could only manage to keep firing at the gaunts only metres from his front. Worst of all, a brood of genestealers now climbed from the hive.
6
The rear group of hormagaunts, although taking heavy fire from Clarke’s guns, shrugged it off and remarkably leapt towards the guns reaching the cover of a pile of rubble in only a few bounds. The genestealers followed up behind the gaunts, using them as a shield. The gaunts in the Chapel, switched their fire from Bogart’s squad to he FSV only a few metres in front of them.
Recovering from the previous explosion, Scott sent another soldier forward to drop a grenade into the nodule, but he must have still been flustered as it did not go off. He was saved from disciplinary action by the mine that immediately popped out of the nodule’s mouth and exploded before he had a chance to look up. Flynn’s men, meanwhile, kept the gaunts in the Archive busy.
Cagney continued to fire at any spore mines that moved across his field of view, but some now drifted behind Gable’s FSV. Wayne saw this and turned his fire on the mine before it got too close. Gable got his sensors rebooted and, encouraged by Lieutenant Robinson, once again fired at the gaunts to his front and killed a further two. While Bogart’s men kept firing as fast as their trigger fingers will let them desperately trying to keep the hormagaunts out of the Shrine, but completely unaware of the genestealers advancing unhindered behind them.
7
The genestealers reached the Shrine and, climbing up and over the bodies of the hormagaunts, poured through the holes in the wall and onto the surprised guardsmen beyond them. With the benefit of the rubble for cover, the guardsmen briefly fought back, but, as they realised the hopelessness of their situation, and watched in horror as their squadmates were eviscerated around them, the last few tried to run. The screams did not last long.
The gaunts in the Archive fired on Scott’s men, still reeling from the two mines that had already hit them. The hormagaunts that had advanced on Clarke’s FSV, kept going and closed on Wayne and his squad, but he and his men turned to meet them and killed three of them with their concentrated hellgun fire. Gable also rolled forward and turned his turret towards the hormagaunts mowing down the remainder.
As yet more spore mines bubbled up from the remaining nodules, Cagney turned his fire on the Shrine suppressing the Genestealers. All these distractions allowed some of the mines to close on the Guardsmen. One detonated against the side of Gable’s Razorback, scaring the armour, but doing no permanent damage. Yet another one detonated amongst Sergeant Scott’s bewildered men, but the Emperor’s protection, and their armour, saved them. But, a third one detonated on the front glacis of Clarke’s Razorback, killing the driver. Corporal Clarke himself, jumped from the turret and began running back towards the platoon CP.
Lieutenant Robinson was on the horn again yelling at Scott and Flynn to pull their fingers out and clear the f#$king Archive building or he would shoot them himself. When, before his eyes, the brood of hormagaunts that had been chasing Bogart’s squad erupted from amongst the Shrine, leapt onto Clarke’s FSV and launched themselves at the running Corporal. No one saw him die as he was smothered by their claws and talons.
And, to make matters worse, the fourth brood of gaunts, that had emerged shortly before, scuttled over the rubble to reinforce their similarly devourer armed swarm-mates in front of the remaining FSV.
8
The situation now looked dire. Their right flank had been turned, as the genestealers wiped out Bogart’s squad and the CP itself was threatened. Flynn and Scott were making little progress against the spore mines and the termagants dug in amongst the ruined Archive building. And the direct route to the hive node was now blocked by fresh gaunts.
The hormagaunts, still covered in poor Corporal Clarke’s blood, launched themselves at Cagney’s squad guarding the CP. The brick walls of the ruined building provided some protection, but the guardsmen were forced back. However, their firepower must have surprised the gaunts because, inexplicably, they turned around and bounded back towards the Shrine.
Meanwhile, after another ear-bashing from the LT, Sgt Scott once again shot the nearby mines and attempted to get to the nodule. This time, the krak grenade went off and turned the nodule into a smoking crater. Corporal Gable once again turned his guns on the devourer armed gaunts in front of him. The remaining troopers and gaunts exchanged fire with little changing. However, ominously, the genestealers were seen moving around inside the ruined Shrine.
9
Sgt Cagney ordered his men to fire everything they have at the genestealers, and they were lost in a cloud of smoking rubble. Flynn and Scott, no longer held up by mines, advanced on the Archive building and fired continuously on the gaunts huddled amongst the ruins. Gable continued to fire at the gaunts between the two buildings, and Wayne exchanged shots with the remaining brood of gaunts in the Chapel. But the firepower was too dispersed and the hormagaunts once again crept towards the CP providing a screen for the genestealers that skulked out of the Shrine behind them. In response, the HQ and Cagney’s squad began a hasty withdrawal in an effort to avoid the same fate as Bogart.
10
Gable turned his turret and fired at the hormagaunts, but his shots went wild. Wayne fired on them too, and the extra experience of his storm troopers paid off as they downed one of them. Under the protection of this volume of fire, Cagney’s squad managed to make it all the way back to the Scriptorium. Again, the battle for the Archive building continued with shots exchanged on both sides.
Confronted by the storm troopers, the genestealers did what they do best and charged Sgt Wayne and his men. Whether it was training, or whether it was fear, they quickly fell back behind the cover of Gable’s FSV. But, LT Robinson noticed they were advancing more cautiously than normal and ordered Wayne and Gable to stand and shoot while they were in the open and crossing the square.
11
Gable kept firing his twin heavy bolters until the barrels were close to melting, but it was having the desired effect of both slowing down the genestealer advance and cutting them down. Wayne and his men added the firepower of their hellguns and the plasma gun to this wall of lead. When the smoke cleared, all of the genestealers were lying in shattered pieces. The hormagaunts flung themselves towards the platoon HQ, while it was otherwise distracted directing the fire of the platoon. Cagney’s squad, now occupying the eastern wall of the Scriptorium, stopped their charge with well timed fire.
End
With the principle threat of the genestealers eliminated and only small groups of gaunts huddled amongst the ruined buildings. The platoon quickly regrouped and destroyed the hive node before it had a chance to convert more biomass into additional alien constructs. The mission was successful, but at considerable cost. Fifteen men were dead, only two of whom had enough body parts to be buried, and one Razorback Fire Support Vehicle was badly damaged.
The men were too tired to celebrate, and were not given an opportunity do so anyway. Not every search and destroy mission had been a success. The remainder of the platoon were soon re-deployed to counter the emergence of an expanded alien threat. The fight for the Anglia System
Commentary
I have played a similar scenario before that pitted Space Marines against a similar Tyranid force. However, this is the first time I have used Tyranid rules based on the latest codex. The primary changes are that the gaunts no longer have the ‘without number’ special rule and the refinements to the ‘instinctive behaviour’ rule. The specific rules and the conversion to SGII will be described in a separate post.
The Tyranid force was deliberately quite light. Anything more difficult would have been impossible for the light infantry of the Guard to deal with. The Genestealers were as destructive as expected and the only hope the Guard have against them is to keep them suppressed so they can not engage in close combat. The lack of any Synapse creatures limited the flexibility of this Tyranid force and the ability of the Guard platoon HQ to focus sub-units and keep the pressure on the Tyranids proved critical. Firepower was subdued in this scenario because almost every unit made use of the prevalent hard cover. However, I am concerned that the Guard still lacks sufficient firepower. Particularly if they are faced with larger creatures.
This is one such battle.
“Right lads, gather ‘round. You have all seen the meteors. They are alien spores. The army is being dispersed to find them and destroy them. A meteor has been reported down in Aquila Square and we have been ordered into the city to clear it.” A murmur ran through the assembled platoon as the soldiers alternately expressed concern and bravado.
“Here is the plan” Lieutenant Robinson continued. “We will approach from the south in a rough line clearing the buildings as we go. The impact has damaged most of the buildings, so be careful.”
“Clarke and Gable, you will form our main fire line. The FSVs will advance north on either side of the square providing fire support. Bogart, your squad will be on the far right and you will clear the Shrine on the east of the square. Flynn, your squad will clear the Scriptorium on the west of the square. Scott, you will be the far left and clear along West St and then the Archive building to the north. Cagney, you will hang back in the centre as a reserve. And Wayne, you and your storm troopers will be the assault team. Once we find the hive, you will take it out.”
“Questions? Ok, mount up, speed is critical.”
1
Bogart and his men crept carefully through the Shrine, picking their way over the rubble. Unseen by Bogart’s men, a brood of termagants, that had emerged from the hive, scuttled into the ruined chapel directly north of the Shrine. Luckily, Corporal Gable, in his Razorback, detected the movement and turned his turret mounted twin heavy-bolters on the aliens, downing one of them. Corporal Clarke, in his Razorback, began picking off spore mines floating across the square.
On the other side of the Scriptorium, Sergeant Scott fired at a floating spore mine, causing it to explode. He then ordered his men to edge forward along the western wall of the Scriptorium. At the same time, Flynn and his squad climbed into the ruined Scriptorium and began picking through the rubble as another brood of termagants slithered out of the hive.
2
LT Robinson grabbed the vox and encouraged his men to push forward as rapidly as possible. Upon reaching the northern end of the Shrine, Bogart’s squad took up firing positions and destroyed yet another floating mine. On the other flank, Scott’s team ran toward the nearby spore mine nodule and dropped some krak grenades into its mouth destroying it with a satisfying bang. Flynn and his men clambered over the rubble to try and keep in line with Scott.
The second brood of termagants rushed towards the Archive building north of the square, while the first brood fired their fleshborers at Bogart’s men, killing one. Clarke responded with his heavy bolters and downed another two of the aliens, and Gable added his suppressive firepower. Meanwhile, Cagney fired at another pair of spore mines drifting across the square. Yet more termagants flowed out of the hive like ants.
3
Bogart’s men fired on and detonated another spore mine that emerged from a nodule in front of them, and Scott did the same, however, it did not explode. Flynn saw the mine and ordered his men to shoot at it too before it reached Scott’s squad. Cagney continued his long range fire at any spore mines that drifted into the open space of the square.
Gable engaged the termagants that were making for the Archive, catching them as they reached the protection of the collapsed walls. One of them didn’t make it. Lieutenant Robinson shouted into the vox for Flynn and Scott to get a move on before the critters could get established in the Archive. But they were still being held up by a couple of spore mines floating in the air between them and their objective. Both teams did, however, now occupy the northern wall of the Scriptorium and could at least bring fire to bear on the Archive.
Assessing that the hive node must be behind the Chapel, where both broods of termagants had come from, Wayne took the opportunity to advance up behind Gable’s Razorback, hoping for a chance to dash froward with his melta-bombs.
Clarke edged his FSV up to the corner off the Shrine and fired at a spore mine drifting towards Bogart. But the third brood of gaunts, armed with devourers, took the opportunity to rush towards a pile of rubble linking the Chapel to the Archive. The gaunts now formed a continuous line protecting their hive and a fourth brood, hormagaunts this time, scuttled out of the hive looking for something to attack.
4
The platoon seemed to be in a good position. Both large buildings had been cleared and the probable location of the hive had been identified. However, the gaunts had dug in amongst the rubble and would prove difficult to eradicate.
Gable turned his heavy bolters on the gaunts directly in front of him in the rubble. The explosive shells halted their advance and tore two of the bugs to pieces. The termagants in the chapel fired on Bogart’s men keeping them busy, but Clarke returned fire with his heavy bolters and swatted yet another bug. This didn’t stop the hormagaunts from rushing over the rear walls of the chapel ready to spring forward and carve up any humans they found with their scything talons.
Meanwhile, on the other flank, Flynn continued to shoot at the spore mines that kept emerging from the earth in front of them. Scott’s team also fired on the spore mines and, having cleared the area, advanced on the nodule. Cagney kept the square clear of mines by continuous fire and it seemed as if every one was firing in all directions.
But, still unobserved, another brood of hormagaunts, erupted from the hive, hungry and angry.
5
Gable kept up his fire on the gaunts at virtually point blank range and another two bugs were left nothing but pools of ooze amongst the rubble. Wayne joined in, firing on the chapel. Flynn took out yet another spore mine and Scott rushed to reach the now unguarded nodule.
The second hormagaunt brood rushed around the chapel, on the eastern side, heading straight for Bogart’s squad in the Shrine. The spore mines continued to drift around the battlefield, and, just as one of Scott’s troopers reached the nodule with a grenade in hand, one emerged and detonated right in his face. The two gaunt broods with fleshborers returned ineffective fire, and the devourer armed brood fired at Gable. The volume of fire from the devourers temporarily knocked out the FSV’s sensors.
The hormagaunts in the chapel then leapt the walls and charged directly for Bogart and his men. Luckily, they saw it in time and scrambled backwards away from the wall just in time at the gaunts stabbed at every gap with their long talons. Falling on their backs and kicking as fast as they could to escape, Bogart’s men fired almost blindly at the gaunts as they attempted to climb through the walls, and, unknowingly, managed to kill one of them.
Cagney maintained his clear-by-fire across the square, and Clarke, having missed the chance to shoot at the first group of hormagaunts, turned his guns on the brood east of the chapel and killed two of them. Lieutenant Robinson tried to encourage Bogart and Scott to keep pressing forward, but Bogart could only manage to keep firing at the gaunts only metres from his front. Worst of all, a brood of genestealers now climbed from the hive.
6
The rear group of hormagaunts, although taking heavy fire from Clarke’s guns, shrugged it off and remarkably leapt towards the guns reaching the cover of a pile of rubble in only a few bounds. The genestealers followed up behind the gaunts, using them as a shield. The gaunts in the Chapel, switched their fire from Bogart’s squad to he FSV only a few metres in front of them.
Recovering from the previous explosion, Scott sent another soldier forward to drop a grenade into the nodule, but he must have still been flustered as it did not go off. He was saved from disciplinary action by the mine that immediately popped out of the nodule’s mouth and exploded before he had a chance to look up. Flynn’s men, meanwhile, kept the gaunts in the Archive busy.
Cagney continued to fire at any spore mines that moved across his field of view, but some now drifted behind Gable’s FSV. Wayne saw this and turned his fire on the mine before it got too close. Gable got his sensors rebooted and, encouraged by Lieutenant Robinson, once again fired at the gaunts to his front and killed a further two. While Bogart’s men kept firing as fast as their trigger fingers will let them desperately trying to keep the hormagaunts out of the Shrine, but completely unaware of the genestealers advancing unhindered behind them.
7
The genestealers reached the Shrine and, climbing up and over the bodies of the hormagaunts, poured through the holes in the wall and onto the surprised guardsmen beyond them. With the benefit of the rubble for cover, the guardsmen briefly fought back, but, as they realised the hopelessness of their situation, and watched in horror as their squadmates were eviscerated around them, the last few tried to run. The screams did not last long.
The gaunts in the Archive fired on Scott’s men, still reeling from the two mines that had already hit them. The hormagaunts that had advanced on Clarke’s FSV, kept going and closed on Wayne and his squad, but he and his men turned to meet them and killed three of them with their concentrated hellgun fire. Gable also rolled forward and turned his turret towards the hormagaunts mowing down the remainder.
As yet more spore mines bubbled up from the remaining nodules, Cagney turned his fire on the Shrine suppressing the Genestealers. All these distractions allowed some of the mines to close on the Guardsmen. One detonated against the side of Gable’s Razorback, scaring the armour, but doing no permanent damage. Yet another one detonated amongst Sergeant Scott’s bewildered men, but the Emperor’s protection, and their armour, saved them. But, a third one detonated on the front glacis of Clarke’s Razorback, killing the driver. Corporal Clarke himself, jumped from the turret and began running back towards the platoon CP.
Lieutenant Robinson was on the horn again yelling at Scott and Flynn to pull their fingers out and clear the f#$king Archive building or he would shoot them himself. When, before his eyes, the brood of hormagaunts that had been chasing Bogart’s squad erupted from amongst the Shrine, leapt onto Clarke’s FSV and launched themselves at the running Corporal. No one saw him die as he was smothered by their claws and talons.
And, to make matters worse, the fourth brood of gaunts, that had emerged shortly before, scuttled over the rubble to reinforce their similarly devourer armed swarm-mates in front of the remaining FSV.
8
The situation now looked dire. Their right flank had been turned, as the genestealers wiped out Bogart’s squad and the CP itself was threatened. Flynn and Scott were making little progress against the spore mines and the termagants dug in amongst the ruined Archive building. And the direct route to the hive node was now blocked by fresh gaunts.

The hormagaunts, still covered in poor Corporal Clarke’s blood, launched themselves at Cagney’s squad guarding the CP. The brick walls of the ruined building provided some protection, but the guardsmen were forced back. However, their firepower must have surprised the gaunts because, inexplicably, they turned around and bounded back towards the Shrine.
Meanwhile, after another ear-bashing from the LT, Sgt Scott once again shot the nearby mines and attempted to get to the nodule. This time, the krak grenade went off and turned the nodule into a smoking crater. Corporal Gable once again turned his guns on the devourer armed gaunts in front of him. The remaining troopers and gaunts exchanged fire with little changing. However, ominously, the genestealers were seen moving around inside the ruined Shrine.
9
Sgt Cagney ordered his men to fire everything they have at the genestealers, and they were lost in a cloud of smoking rubble. Flynn and Scott, no longer held up by mines, advanced on the Archive building and fired continuously on the gaunts huddled amongst the ruins. Gable continued to fire at the gaunts between the two buildings, and Wayne exchanged shots with the remaining brood of gaunts in the Chapel. But the firepower was too dispersed and the hormagaunts once again crept towards the CP providing a screen for the genestealers that skulked out of the Shrine behind them. In response, the HQ and Cagney’s squad began a hasty withdrawal in an effort to avoid the same fate as Bogart.
10
Gable turned his turret and fired at the hormagaunts, but his shots went wild. Wayne fired on them too, and the extra experience of his storm troopers paid off as they downed one of them. Under the protection of this volume of fire, Cagney’s squad managed to make it all the way back to the Scriptorium. Again, the battle for the Archive building continued with shots exchanged on both sides.
Confronted by the storm troopers, the genestealers did what they do best and charged Sgt Wayne and his men. Whether it was training, or whether it was fear, they quickly fell back behind the cover of Gable’s FSV. But, LT Robinson noticed they were advancing more cautiously than normal and ordered Wayne and Gable to stand and shoot while they were in the open and crossing the square.

11
Gable kept firing his twin heavy bolters until the barrels were close to melting, but it was having the desired effect of both slowing down the genestealer advance and cutting them down. Wayne and his men added the firepower of their hellguns and the plasma gun to this wall of lead. When the smoke cleared, all of the genestealers were lying in shattered pieces. The hormagaunts flung themselves towards the platoon HQ, while it was otherwise distracted directing the fire of the platoon. Cagney’s squad, now occupying the eastern wall of the Scriptorium, stopped their charge with well timed fire.
End
With the principle threat of the genestealers eliminated and only small groups of gaunts huddled amongst the ruined buildings. The platoon quickly regrouped and destroyed the hive node before it had a chance to convert more biomass into additional alien constructs. The mission was successful, but at considerable cost. Fifteen men were dead, only two of whom had enough body parts to be buried, and one Razorback Fire Support Vehicle was badly damaged.
The men were too tired to celebrate, and were not given an opportunity do so anyway. Not every search and destroy mission had been a success. The remainder of the platoon were soon re-deployed to counter the emergence of an expanded alien threat. The fight for the Anglia System
Commentary
I have played a similar scenario before that pitted Space Marines against a similar Tyranid force. However, this is the first time I have used Tyranid rules based on the latest codex. The primary changes are that the gaunts no longer have the ‘without number’ special rule and the refinements to the ‘instinctive behaviour’ rule. The specific rules and the conversion to SGII will be described in a separate post.
The Tyranid force was deliberately quite light. Anything more difficult would have been impossible for the light infantry of the Guard to deal with. The Genestealers were as destructive as expected and the only hope the Guard have against them is to keep them suppressed so they can not engage in close combat. The lack of any Synapse creatures limited the flexibility of this Tyranid force and the ability of the Guard platoon HQ to focus sub-units and keep the pressure on the Tyranids proved critical. Firepower was subdued in this scenario because almost every unit made use of the prevalent hard cover. However, I am concerned that the Guard still lacks sufficient firepower. Particularly if they are faced with larger creatures.
Sunday, March 14, 2010
Stargrunt House Rules
Close Combat
Close combat is initiated in the same way as in the standard rules. However, once the two squads have made contact, the outcome is resolved differently. Instead of pairing off individuals, the combat is resolved on the basis of whole squads, in a similar manner to shooting, using opposed die rolls.
The attacker rolls at least 2 dice; the quality die for the squad and a melee die determined by adding the melee values of the close combat weapons carried by the squad. In addition, he may roll extra dice if the squad includes any special melee weapons. Unlike ranged combat, extra dice can be rolled in close combat if the squad’s melee score exceeds 12 by a whole die. For example, a 10 man squad equipped with melee value 2 weapons could roll a d12 and a d8. However, the extra score must be a whole die type, not rounded to the nearest die type as the initial die is.
The defender rolls the quality die for the defending squad. In the first round of close combat, the defender gains a +1 die shift if they are in position or in cover. This does not apply in subsequent rounds. The quality die of the attacker and/ or defender is shifted down if their morale is below steady: shaken = -1, broken = -2 and routed = -3.
If none of the attacker’s dice beat the defender’s then his attack has been ineffectual. If a single die beats the defender’s then no casualty is scored, but the defender adds 1 to his threat level when taking a reaction test at the end of the combat round.
If two or more of the attackers dice beat the defenders die, then the attack has potentially caused some casualties. Add all of the attacker’s dice and divide this total by the quality die type of the defender to calculate the number of potential hits. Any remaining points represent the chance, using the defender’s quality die, of an extra potential hit. For each potential hit, make an opposed die roll comparing the damage of the attacker’s weapon to the armour of the defender.
These casualties are not actually removed until the combat round is completed. That is, casualties are able to contribute to the combat in the round in which they were incurred.
The process is then repeated with the defender taking the roll of the attacker and vice versa. Once both sides have determined how many casualties they inflicted on the other side, these casualties are allocated as for allocating casualties from direct fire.
Reaction tests are then made as in the standard rules to see if the combat continues or one side breaks off. Note, the morale effects are applied to the quality die as above. If a squad withdraws as a result of the morale, the opposing squad has the option to pursue (based on rolling its own movement die) and if it catches the retreating squad, a further round of CC is fought taking into account the new (lower) morale of the withdrawer.
Voluntary Withdrawal
There are occasions where it might be preferable to voluntarily withdraw from close combat either before it begins, or after a round. A player may opt to voluntarily withdraw instead of attempting a reaction test to stand and receive a charge, or to remain in the combat. If this option is taken, the squad in question withdraws a combat move and incurs a –1 drop in confidence. The opposing squad(s) left in the combat automatically occupy the vacated position (if desired).
Multiple Squads in Close Combat
There will be many situations where multiple squads are engaged in the same melee. In many cases, squads can simply be paired so that there are a number of one on one combats. However, at times, one squad will be left engaged by two or more enemy squads. In these circumstances, the single squad should split its attacks between its enemies. For example, if squad A of 10 men, is attacked by squad B of 8 men and squad C of 6 men, squad A will make one attack with 5 men against each of the other squads. It will still take a reaction test using the total number of casualties scored against it.
Bikes and Cavalry
Some troops are mounted on horses, bikes or some other sort of beast. They are treated as infantry when fired at by small arms and support weapons, and class 1 vehicles when fired at by heavy weapons. They have an armour class calculated as for infantry. They are also able to engage in close combat as infantry do.
Mechs
Many sci fi settings include monsters and vehicles that could be described as mechs. Such models are treated as vehicles for the purpose of ranged combat. That is, they have a size and armour class etc. However, they are able to engage in close combat.
When attacking in close combat, they use their quality die as normal and they will usually be equipped with one or more specialist close combat weapons and hence will roll multiple support dice as well. When defending in close combat, they multiply their quality die roll by their size modifier. Hence, larger mechs will be harder to damage in close combat.
Unlike ranged fire, normal squad weapons can damage mechs if they first score enough to beat the mech’s defence die and then beat its armour die which is multiplied by its armour class. It will usually take another mech with a heavy melee weapon to bring down a large mech.
Multiple Weapons
As noted above, mechs may be equipped with multiple weapons, both close combat and ranged. In close combat, the extra weapons simply add to the number of dice the mech rolls to inflict hits. In ranged combat, the mech can fire one or more weapons at a single target as one action, and then any remaining weapons at the same or a different target as a second action.
Cover and Concealment
The standard SG rules apply a range die shift and an armour die shift for cover. In fact, cover and concealment are two different effects. Concealment, representing some form of partial obscuration, provides a +1 range die shift for shooting and spotting. Cover, representing some form of actual protection, provides a +1 or +2 armour die shift for soft and hard cover respectively.
Night Fighting
Some battles will be set during the night or low light. This may have an effect on the ability of some troops to spot and hence target the enemy. Troops that are not equipped with specialised night vision equipment (most aided and enhanced vision and all superior sensors will include night vision capabilities) are penalised by giving the target a +2 die shift to avoid being spotted.
Friday, March 12, 2010
Clone Wars Ships
In response to a question posted to TMP, I have uploaded the following Full Thrust ship SSDs. These were created in about 2008 and were based on the models produced by wizards of the coast. Because the models are themselves physically quite large, I allocated them quite a lot of mass just in case I ever decided to use them with my standard GZG fleets.
The games were intended to be an introduction for players who had never played FT before. Hence, I did not inlcude any fighters. The SML launchers on the Republic ships were intended to replace their capacity to launch fighter based assaults.
I did not do a Trade Fed carrier because I wanted the two fleets to play slightly differently.
Trade Federation Destroyer (#33)
Mass 140
NPV 467

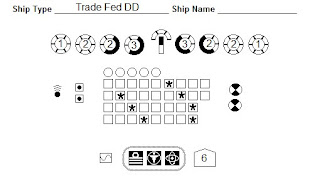
Trade Federation Battleship (#37)
Mass 330
NPV 945

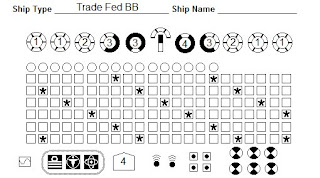
Republic Star Destroyer (#6)
Mass 200
NPV 654


Republic Cruiser (#11)
Mass 121
NPV 395
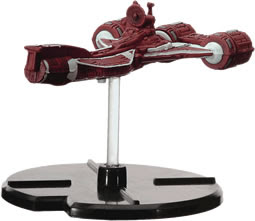
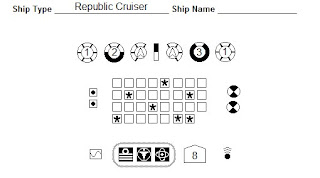
Republic Assault Ship (#5)
Mass 204
NPV 663


Friday, February 19, 2010
Scenario 2. Hold them Off
Having defeated the first hive ship, the damaged Emperor's Wrath must confront a second one.
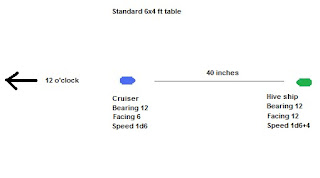 Battle Report:
 Battle Report:
“Entering range now. Engaging.” Both ships exchanged ineffective long range fire.
“All ahead full, then make a tight turn to starboard and set up to chase it. Keep the starboard batteries lined up as it closes.” The captain remained calm and his bridge crew set about their jobs with practiced efficiency.
“It’s launched one of those projectiles. Brace for impact.” Announced the weapons officer. An explosion rocked the ship, rupturing the hull in many places and a salvo of energy beams struck out from the alien ship.
The captain shouted above the alarms “get us turned about and launch torpedoes as it passes. Maybe that will keep them busy. Get me a damage report, Ex.”
“Multiple hull breaches. Blast doors are holding. We’ve lost one light gun battery. Engineering also reports the FTL drive is down."
“Torpedoes away, sir. Magazine reports that was our last salvo. It continues to close at high speed.”
The large view-screen displayed the alien ship in close-up. The impact of lance and beam weapons showed clearly on its hull.
“None of our torpedoes hit sir. It crossed in front of us too rapidly for them to get a lock.”
Suddenly, a chunk of the alien ship erupted and tore lose, tumbling away and breaking up. “That was a lance strike sir. At this range they are pretty destructive.”
“Keep firing and get the other battery on-line.”
“Brace. Brace. Brace” yelled the weapons officer. The hive ship launched another plasma bolt and at this range, it would take no time to reach them. Once again, the cruiser shook as the force of the plasma bolt raced along the hull, cracking seems and ripping out bulkheads.
“One lance battery is out. Returning fire.” The screen showed another tear in the alien hull and lumps of biomass broke loose and scattered in all directions. But another series of energy beams shot from the hive ship causing the cruiser to lurch as the hull was breached again. “We just lost the other lance battery ,sir. Shields have gone and the main drive is also damaged.”
“Roll the ship and bring the other batteries to bear. Try and stay with it as long as possible. It looks pretty badly damaged to me. We just might get lucky.”
The ship shuddered as the artificial gravity compensated for the roll. The alien ship continued to fire as it rapidly moved away. Then, as soon as they could target the enemy, the cruiser’s port side weapons opened fire in one concentrated volley. On the screen, the hive ship simply fell to pieces. The high energy lance beams cut through what was left of the enemy hull until it burned away to nothing.
“Damage?” the captain asked as he turned to the XO.
“We’re in bad shape, sir. No FTL. Main drive is damaged. We’ve lost both starboard lances and both light gun batteries. All fires are contained, but that is largely because we are venting atmosphere from multiple breaches. I have no tally of crew casualties yet, but it will be bad. With luck, some of them made it to life pods, but we are in no position to attempt to recover them.”
“Nav, how long to reach port?”
“Two hours at current best speed.”
Once again the hooded psyker interrupted. “But we won’t have that long. Look at the scanner.”
"We won't survive another battle. Turn for port. Signal mayday and request assistance. Tell Mercia Base they have an incoming hive ship. Ex, concentrate on the engines, we will need all the speed we can get to escape or to manouevre if that thing catches us. I'll be in sick bay."
Comments:
These two senarios were deliberately very simple. The aim was just to compare the two ship designs and see how they played. The plasma bolt can be very destructive, but suffers because of its limited rate of fire. The vapour shroud seems largely useless. It may be better to replace it with more armour.
Scenario 1. Interception
This scenario pits a Lunar class cruiser - The Emperor's Wrath - against a hive ship. It is a very one-sided scenario as the cruiser has considerably more mass than the hive ship.
“We’ve just emerged in the Anglia system, sir” announced the navigator.
“Unknown contact starboard aft, moving toward us” the scanner operator interrupted excitedly. Then added “ It’s definitely a ship and there’s no IFF signal.”
“Helm, turn to intercept it” the captain responded calmly. “EX, sound action stations. Weapons, launch some sensor drones. I want to know what that is.”
“Drones launched sir. It’ll take a couple of minutes for them to cover the distance.”
“Oh, its them alright” said the hooded officer from his darkened corner of the bridge.
“You can sense them from here?” asked the captain sceptically.
“An evil that strong pervades even the vacuum. Yes, it’s them, and they are hungry.”
“Confirmed sir. The drones have it. It’s a hive ship. We’ll get video in a few seconds.”
The screen lit up with a pixelated blob that gradually resolved into – what? A tentacled writhing mass of vile warpspawn.
“Emperor protect us”, murmured someone.
“Fire as soon as we are in range. Then turn to port and follow it. Nav, calculate the burn we will need to match their velocity. Comms, notify the local authorities we are here and are engaging.”
“Ten seconds sir”, the weapons officer intoned. “Seven ... six ... five ... four ... three ... Firing ... Now.”
Both ships accelerated toward one another and the ‘Wrath’ fired as soon as it entered maximum range. At that range, the weak energy beams were deflected by the Tyranid’s vapour shroud.
“It seems to have some sort of energy shield, sir. Fire was ineffective.” The weapons officer reported.
“Fire a torpedo salvo and turn as we close to bring the starboard broadside to bear. At closer range we should do some damage.” The captain calmly instructed.
“It has launched some sort of projectile at us. PDS engaging.” The ship shook and alarms blared as a large explosion rocked the ship. “Minor damage sir, but is has blown away most of our armour.” At almost the same instant, two of the Wrath’s torpedoes locked onto the alien vessel and impacted blasting biomass into space.
“It has turned towards us, sir” the sensor operator reported.
“Fire another torpedo salvo. All weapons fire at will.”
Another volley of torpedoes locked on and exploded along the forward edge of the hive ship. This was quickly followed by a full broadside of weapons and lances. The hive ship disintegrated in a series of internal explosions with biomass scattered in all directions.
“Target destroyed” stated the weapons officer matter-of-factly.
“Well done, gentlemen. Nav, plot a course for Mercia.” But even as the words left his mouth, the Captain could tell from the grin on the hooded Psyker’s face that it was not that simple.
“Another target, sir. Coming in right behind us. It looks like another one” announced the sensor operator.
“Helm, turn us about. Nav, match its velocity. Weapons, stand by. Engage at will.”
To be continued...
The setup is very simple. Each ship starts in opposite corners of the same short table edge heading towards the centre of the table on an intercept course.
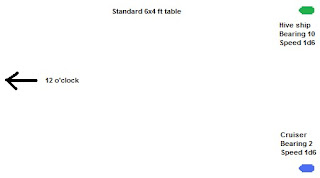
Battle Report:
There was a slight jolt as the ship returned to real space.“We’ve just emerged in the Anglia system, sir” announced the navigator.
“Unknown contact starboard aft, moving toward us” the scanner operator interrupted excitedly. Then added “ It’s definitely a ship and there’s no IFF signal.”
“Helm, turn to intercept it” the captain responded calmly. “EX, sound action stations. Weapons, launch some sensor drones. I want to know what that is.”
“Drones launched sir. It’ll take a couple of minutes for them to cover the distance.”
“Oh, its them alright” said the hooded officer from his darkened corner of the bridge.
“You can sense them from here?” asked the captain sceptically.
“An evil that strong pervades even the vacuum. Yes, it’s them, and they are hungry.”
“Confirmed sir. The drones have it. It’s a hive ship. We’ll get video in a few seconds.”
The screen lit up with a pixelated blob that gradually resolved into – what? A tentacled writhing mass of vile warpspawn.
“Emperor protect us”, murmured someone.
“Fire as soon as we are in range. Then turn to port and follow it. Nav, calculate the burn we will need to match their velocity. Comms, notify the local authorities we are here and are engaging.”
“Ten seconds sir”, the weapons officer intoned. “Seven ... six ... five ... four ... three ... Firing ... Now.”
Both ships accelerated toward one another and the ‘Wrath’ fired as soon as it entered maximum range. At that range, the weak energy beams were deflected by the Tyranid’s vapour shroud.
“It seems to have some sort of energy shield, sir. Fire was ineffective.” The weapons officer reported.
“Fire a torpedo salvo and turn as we close to bring the starboard broadside to bear. At closer range we should do some damage.” The captain calmly instructed.
“It has launched some sort of projectile at us. PDS engaging.” The ship shook and alarms blared as a large explosion rocked the ship. “Minor damage sir, but is has blown away most of our armour.” At almost the same instant, two of the Wrath’s torpedoes locked onto the alien vessel and impacted blasting biomass into space.
“It has turned towards us, sir” the sensor operator reported.
“Fire another torpedo salvo. All weapons fire at will.”
Another volley of torpedoes locked on and exploded along the forward edge of the hive ship. This was quickly followed by a full broadside of weapons and lances. The hive ship disintegrated in a series of internal explosions with biomass scattered in all directions.
“Target destroyed” stated the weapons officer matter-of-factly.
“Well done, gentlemen. Nav, plot a course for Mercia.” But even as the words left his mouth, the Captain could tell from the grin on the hooded Psyker’s face that it was not that simple.
“Another target, sir. Coming in right behind us. It looks like another one” announced the sensor operator.
“Helm, turn us about. Nav, match its velocity. Weapons, stand by. Engage at will.”
To be continued...
Monday, February 15, 2010
Tyranid Hive Ship
The hive ship is based on Phalon technology, although I am using a Sa'Vasku model of a Shyy'Tha'Var class battlecruiser. I have given it a basic mass of 100.


Tuesday, February 9, 2010


Monday, February 8, 2010
Imperial Lunar Class Cruiser
The lunar class cruiser is one of the major cruiser designs.

Like most imperial ships, it mounts its weapons along the length of the ship in two broadsides. The starboard broadside consists of:
1 heavy (class 3) beam (weapons batteries) limited to starboard for and aft arcs (FS, AS); and
2 torpedo tubes firing for and aft (FS, AS).
The port broadside is the mirror image.
The broadside firepower is supplemented by a forward firing (FP, F, FS) salvo-missile launcher, 2 light (class 1) beams, and 4 point defence systems.
All of this firepower is coordinated through 3 fire control computers.
This class of ship is reasonably well constructed and well manned. It is also equipped with level one screens and a small amount of armour. It has acceptable thrust for a ship of this size.
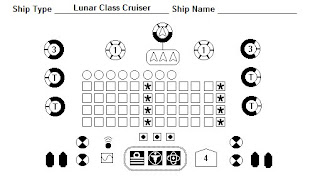
This class of ship forms the basis of a number of similar ships.
Subscribe to:
Posts (Atom)